description.jpg) |
| Pacific Coin Machine Journal - October 1934 |
Tuesday, March 4, 2014
Woof Woof
Just an article about Harry Williams the creator of Signal that I found interesting. The article is courtesy of Rob Hawkins at http://www.pinballcollectorsresource.com/
Friday, January 24, 2014
The Super-8
I started a new blog to chronicle my restoration of the Super-8. You can read about it here: http://1934super8.blogspot.com/
Monday, January 13, 2014
Coming soon...
I will shortly begin restoring my newest 80 year old machine. I purchased a 1934 Super-8 pinball machine made by Stoner Manufacturing. Luckily it was built in the same year as my Signal so I don't need to buy more buffalo nickels of a different year.
Because you need to use currency from the same year as manufacture, everybody knows that.... ;-)
Because you need to use currency from the same year as manufacture, everybody knows that.... ;-)
Tuesday, November 19, 2013
1934 Bally Signal video demonstration
I was asked to make a video demonstration on how the game works. I have uploaded a fairly brief video of the machine to youtube. It is not great quality but should give you an idea of how the game works.
Monday, November 11, 2013
How the Game is Played - Part 2
So I originally tried to make my own instructions off of a photo of the original instructions. I was not very happy with out they came out. Somebody sent me a scan of the original instruction card for their machine and I was able to clean it up. The original was printed on silver paper which really does not work too well with an inkjet printer so I was not able to do that. I did make the background a light grey to try to give a similar look which is hard to see in the photo but none the less I am happy with how it came out. My original frame was rusted right through the plating and I tried to have a new one cut but the cost was too high so I wound up cutting it myself out of aluminum sheet with a straight edge and a utility knife. I am very happy with the results.
 |
| Cleaned up scan of original instructions in the new frame |
Tuesday, November 5, 2013
99.44%
I am 99.44% done. So pretty much done... :)
As previously mentioned, I stripped the legs and repainted. I purchased new leg levelers and made leg bolts. The originals were in bad shape, they were very hunked up and areas of the nickel plate was chipped off. They do not make bolts like that anymore (or if they do, I could not find them) so I purchased nice shiny new nickel plated acorn nuts and some all-thread rods and cut them to length and glued the acorn nuts to the top of them to make my own.
I also painted the red and green circles on the sides of the cabinet. I spent like $35.00 on paint for about a few inches of color so now need to find something to paint red and green... :)
It is all assembled and I played it last night for about an hour. I had some issues with the metal openings under the runway areas opening and closing properly so took me a while to get the kinks worked out but all seems to be running smoothly. It still has it's warts. The legs are not great but until I can find new ones they will do. The cabinet has a slight twist where the back left and front right corner are raised a little higher. It does not seem to cause too many issues but on occasion a ball will not return down to the ball lifter and I need to give the machine a little jiggle which can knock the tilt ball off it's pedestal but not the end of the world. One of the gates has stayed up after raising a few times but drops down after a little bit. I am hoping with more use it won't be an issue.
I cut the new coin door and am in the process of finishing it. I should have it done in a day or two. I am still working out the frame for the instruction card but should have it on the machine shortly.
Below are some updated pictures.
 |
| Paint job complete |
 | ||||
| With no glass. You can see my 1934 Buffalo nickel :) |
 |
| Assembled with glass installed. I had a bad score... |
 |
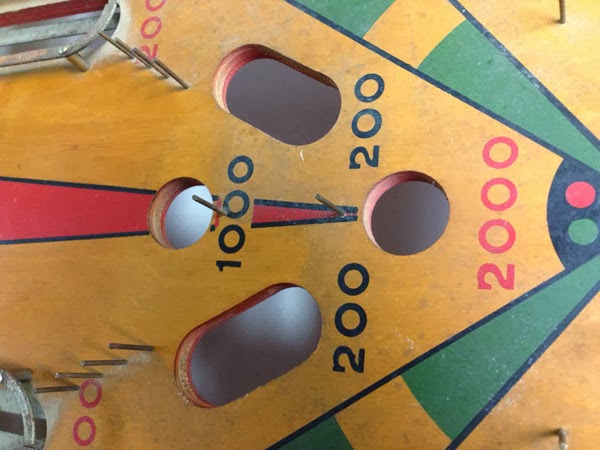
| Lower playfield |
 |
| Upper playfield |
 |
| Shiny tilt cup |
 |
| Shiny shooter |
 |
| Coin slide installed |
Monday, November 4, 2013
A few kinks to work out
So, I finished my coin door (twice as the first one was damaged when drilling the hole for the lock). I painted the old legs and the machine is once again standing on it's own. I started putting it all back together but once the playfield was put on, I cannot fully push in the coin slide yet works before the playfield was out on. I need to figure that out tonight. So once that is resolved, all I have left is putting the finish on the door and installing the lock. Whoo hoo! :)
Friday, November 1, 2013
Finish line in sight...
The finish line is definitely in sight. I think I will be done by the end of the weekend. My glass came in today. I also purchased new leg bolts (still need need to cut them to length) and new leg levelers. I removed the paint from the existing legs and there was lots of staining from the water damage and I started to repair the rot. Tomorrow I will sand the repaired areas and prime and paint as long as the weather is good. I still need to do the 2 red and 2 green circles on the sides of the cabinets and will do the first coat tonight. I need to still address the coin door. I will work on that tomorrow (again if the weather is good). I ordered a new lock for it and it should be in any day as well as the stain for it that I believe matches the cabinet closely. I still need to address the rusty frame for the instruction card as well. So hopefully all can be completed by the end of the weekend...
 |
| Discolored legs from water damage |
 |
| Water damage before repair |
 |
| Crack in top of one leg |
Sunday, October 27, 2013
A Sigh of Relief
OK, I am nearly there (do not search this site to see how many times I have said that before)....
The one thing that was scaring me most about this project and most afraid to #@*& up is complete...nearly. :) I finally painted the cabinet, at least part of it. I still need to do the red and green lights but I did do the black part of the semaphore. John, a member of the Prewar Pinball site who has not just one, but two signals contacted me and he took some pictures of his machines and I was able to recreate it. He has both the Bally version as well as the Automatic Amusements version. Harry Williams of Automatic Amusements who designed the machine, licensed the design to Bally to sell in the Mid-West and Eastern US, while his company sold it in the Western US. The machines are almost identical with a few differences in the paint schemes being the main differences. He is going to measure the red and green lights radius for me and then I will finish the paint job. I am really happy with how it came out.
I am also in the process of trying to straighten my one bent leg and will try to repair the water damage to the bottoms and repaint them while I wait to see if I can find a builder for new legs. Then I will finally be done with this project. Well wait, I still need a coin door. Well I am nearly done... ;-)
 |
| Cabinet left side |
 |
| Cabinet right side |
Friday, October 25, 2013
It's Alive!
So I ordered the glass and it will be here next week but in the mean time I put everything together to test it and it is working great for the most part. The two back runways when they open up to let the balls drop when you start the game were sticking open on occasion. I purchased new springs today for them and will try again this weekend to see if that solved the issue.
I also am still trying to find legs but not having much luck. Worst case I use the originals, warts and all.
I also need to paint the side art. Hopefully will do that within the week.
My youngest daughter is hooked already. She played it with me yesterday and today wanted to again after dinner but I told her I took it back apart and she cried like the world was ending...
Here is a peek at how the playfield looks now that it is all put back together.
 |
| Playfield after lots of hours of cleaning and polishing.... |
Tuesday, October 22, 2013
Clean and Shiny
I feel like I am in the home stretch but I keep thinking that and my completion date keeps getting pushed out...
Today I took the cabinet to be measured for replacement glass. They said about 8 to 10 days, which is way longer than I was expecting and wish I had gone a week ago but it's OK I have other stuff still in need of attention. I could have gone with 1/4" glass but the cabinet has a twist where the back left corner raises and the front right corner raises as well so to be sure there was a little wiggle room we went with 3/16".
I have completed the cleaning of all the metal parts and have started putting all the parts back where they belong. All of the now rust free pins have been put back in the playfield as well as the rails that run around the gates. I have also reassembled the plunger after cleaning. I won't put it back in the cabinet until after I pick up the glass so that I can take it with me again to make sure the fit is correct. I don't want to risk something happening where it gets damaged.
I had mentioned in a previous post about a way I read about and tried for removing rust. Even though I had read about it and watched a few videos of results I was still was really amazed after I tried it. I did this first with the outside plunger spring. It was very rusty and I tried polishing it in a tumbler but after 24 hours it still looked the same. So I looked into getting a new spring and could not find one and so started looking at ways to remove the rust. I found two good options and went with the one that I thought was less risky and if it did not work I would try the other.
The process is simple. I took the rusty spring and I put it in a mason jar and covered it with white vinegar and sealed the jar and let it sit. Not much happened at first but a few hours later you could see bubbles forming on the spring. After 24 hours there was rust on the bottom of the jar and the vinegar was very dirty and murky and I removed the spring. The vinegar stunk terribly when I opened it and the spring had a black film all over it. I rinsed it off and dumped and rinsed the jar. I then put the spring in water and a few heaping tablespoons of baking soda which neutralizes the affect of the vinegar and let it sit for about 5 min. Then took it out again and rinsed and dried and through in the tumbler and it came out nice and silver and rust free again. It worked so well I did the same the playfield pins. With a larger item you could just polish by hand after. Pictures of the before and after are below.
I also still need a set of legs or fix the ones I have. I found a website where you can ask local people who make custom furniture to bid on your job. I am hoping even though it would be a much cheaper project than they are used to that it would be a quick one so they would take it on. We shall see...
Lastly I still need to paint the artwork on the sides of the cabinet.
The home stretch will be long but I at least can see the finish line. :)
 |
| Rusty plunger spring |
 |
| Plunger spring after a soak in vinegar and some polishing |
 |
| Oxidized shooter assembly |
 | |
| Shiny shooter assembly after polishing |
Monday, October 21, 2013
My aching arms...
I just put the 2nd of the 5 recommended coats of SC Johnson paste wax on the playfield of the Signal. All I can say is, I can totally see why it is not the method of choice to protect furniture for most people no matter how nice it looks. Holy crapola...
Thursday, October 17, 2013
A History Lesson and an Update
Just a quick update on where I am with the restoration and a little bit of history of pinball itself.
The restoration update:
I have spent the past week waxing the playfield (I finished the 6th and final coat last night) and continuing on cleaning and rust removal of the parts. I wound up in the end removing all of the pins from the playfield for two reasons. One reason, it was to better clean them and remove 100% of the rust and the other reason was I really did not see an easy way to fully clean and wax the playfield as there are so many pins and many are close together. I need to see how others handle this as I cannot keep pulling them out but in this case I am glad I did because I was able to really get them looking nice and shiny. I will detail the cleaning process with some photos later in the week as it was really amazing how it worked and there are other things that this process can be used on.
I hope to start assembling the playfield tonight. I still need to take care of a few things but I am at least ready to start reassembling some of it. I still need to paint the sides of the cabinet, take care of the legs, make a new coin door and purchase the glass to name the large items still in need of addressing.
The history:
When researching for the project, I have come across some interesting information. If anybody is interested in reading more about the history of pinball this is a good link to check out: Pacific Pinball Museum
One interesting fact from that link that I did not know before I started this was that pinball was made illegal in many cities across the United States because it was considered a form of gambling as well as something that could corrupt the youth of America. It was banned in NYC for example from January 1942 until May of 1976. I found that to be absolutely crazy (in my mind anyway) that it could have been banned up until that time. Having grown up in the 1970s I just find it hard to fathom. When the ban first went into affect the mayor of NYC would have the machines captured in raids dumped into the surrounding rivers. Crazy....
Wednesday, October 9, 2013
How to play the game...
One thing that I am still working on is to recreate the instruction card for the machine. The original instruction card was no longer on the machine and way back when somebody typed one on a typewriter (remember typewriters?) and put it on the machine. It was badly damaged and had a big chunk missing so I did not even know the rules of the game so I started looking for a copy of the original or just even what the rules were. Rob Hawkins at Pinball Collectors Resource was nice enough to send me a couple of photos of machines that had the original instruction cards on them to work from. I was able to take the 2 photos and copy certain parts out of it to recreate the card. It is not perfect by any stretch but for now will do. I had trouble tracing parts on the computer so had to print and trace by hand in two layers and scan back in then trace again with the computer and the result has some issues with the letters on the logo but I will try doing it again and see if I can do better. But as of now this is what I have. Also the frame around the instructions is very damaged, rust has eaten right through the plating into the metal underneath and I am unable to remove it. I will have to look to see if a replacement can be obtained.
 |
| Damaged typed instructions from my machine |
 |
| Photo of original instruction card courtesy of Rob Hawkins |
 |
| Hand traced image of the signal gate and the text drop shadow |
 |
| Hand traced image of the text |
 |
| New instruction card I created, still needs work but for now it will do |
Saturday, October 5, 2013
The Dirty Parts
I have been working at night a little bit to clean up some of the dirty and or rusty parts. Some were extremely dirty and oxidized and others coated with rust. It has been a tedious process using a dremel to remove the rust and oxidization. The ball lifter and the coin mechanism both had gunk all over them and looked to have been oiled at some point and I was told that the parts should not have been oiled. So first I needed to get the oil off. I soaked the parts in mineral spirits to break down the gunk. The ball lifter I let soak for several hours as I wanted to make sure any oil and gunk inside was broken down. After soaking and cleaning of the parts I let them dry for a long time to make sure all traces of the mineral spirits had evaporated. Then I got to work removing rust from any rusty parts and then got to polishing. Here you can see the fruits of my labor. I do prefer the look of brass with patina on it but once I started removing the gunk and dirt I wound up taking off the patina in parts so decided to remove it all and polish it. I am still working on the ball lifter and some of the other parts but here are a few...
 |
| Rust rod that is attached to both the ball lifter and the coin slide. It locked the ball lifter to prevent somebody from holding the coin slide in and just keep shooting for free. |
 |
| After rust removal and polishing it is hard to believe it is the same part. |
 |
| This is where the ball is ejected for play. Note the dark groove along it from the balls. |
 |
| Close up shows some pitting. |
 |
| More pitting and damage. |
 |
| After a nice cleaning and polish. Shiny, shiny... |
 |
| I was able to get most of the groove removed and cleaned up nicely but still it is pitted and will be staying that way.. |
 |
| The dirty gunky oxidized coin mechanism. It looks nothing like this anymore... |
 |
| From looking at it before cleaning you would have thought both the slide part and the part that bolts to the cabinet were the same finish. |
Tuesday, October 1, 2013
Cabinet art
One thing with my Signal, is as long as we have had it, the side art has been missing. In fact I only noticed recently that it had any art once before. On one side of the machine you can see the outline where it once was. That side of the machine was always against the wall. When we started to redo our basement we moved it into another room and that side was exposed. I tried to figure out what it was but could not. Then after finding out what my machine was, I was able to find a couple of pictures of the design. So now I have started looking into what types of paint to use. I have ordered paint mask and will attempt to paint the design on the cabinet after testing on some scrap wood first.
Click HERE to see what the original cabinet art looked like.
Click HERE to see what the original cabinet art looked like.
 |
| Missing cabinet art |
Electrical tests
I next tested the electrical. I was not even sure how the battery hooked up at first as it was disconnected years earlier. Ken at Prewar Pinball again helped me out with what I needed to do as well as helped me troubleshoot a few issues with it. I had a one switch that was bent up to where it could not make contact and another that was fouled with grime that needed to be sanded off. I was able to get it working so the hurdle I was most concerned with was cleared. The only thing I was not happy with the electrical is that it is battery powered. I don’t like using batteries because I know that even if you recycle them properly, parts still wind up in the ground. So with that I decided to look to convert to use AC power. I had come across other machines online that said they were converted but I was not sure how to go about it. It winds up most people use a battery charger to run it so that is what I will do as well.
 |
| Rusty battery |
 |
| Solenoids that operate the railroad gates |
 |
| All the electrical wiring |
Rust Removal of Metal Playfield Parts
The next step was to remove as much rust and oxidization from the metal parts on the playfield as I could. As you can see the rails around the railroad gates were in very bad shape. Before I started I could see they were in bad shape but when I took the playfield out and got a closer look I was dismayed to see just how badly damaged they really were. I did not have too much hope I could get them to look much better.
I bought some new sanding wheels and buffs to try to remove as much as I could with a Dremel. I was surprised and quickly encouraged with how well they started to look in fairly quick order. I was able to remove all the rust and make them look pretty well considering but there are some pitted areas unfortunately. I plan on putting them in a tumbler to see if I can get them polished a little better if they fit in it.
The pins/nails in the playing field mostly were also pretty rusty. I tried using a sanding buff on them but the buff got destroyed in a min or two so I switched to a small wire wheel. It worked really well but with working around a small cylindrical object would cause the Dremel to get pulled off to the side from the force of the wheel against the pin. Mostly it was controllable but at times the motor of the Dremel would be powerful enough to pull me off the pin. My concern with that was it pulling off and hitting the playing field. So what I did to prevent that happening was I took a piece of aluminum flashing and cut a small square and drilled a hole in it slightly larger than the pin and slipped it over the pin onto the table. This also helped me get much closer to the playfield without concern of hitting it. In doing this I was able to clean all of the nails aside from the ones closest to the outside ball track.
So I needed a way to get close enough to the track but not damage it. I finally decided to remove it. It was only connected by a handful of screws so thought no big deal but realized it was still attached by the spring gate that prevents the balls from going back down to the plunger. When viewing another person’s restore of another 1930s machine I noticed they took theirs off so asked about it. They said it should pull right out fairly easily. So I pulled it and yes it came out easily, only it came out easily only on one side, the other side broke off unfortunately. It is fixable though at least. I was able to purchase new music wire to remake it but I could not get it in nickel finish, so I will need to nickel plate it if I cannot find it somewhere else. Not the end of the world, it can be taken care of. So now I just need to finish the rest of the nails and a couple of wire gates on the playing field and will be done with that part. Then clean it once more and then decide on what type of wax to use for the surface.
 |
| Rusty rail around railroad gates |
 |
| Rust removed from rails |
 |
| Rusty pin |
 |
| Flashing to protect the playfield |
 |
| Pin with rust removed |
Cleaning of the Playfield
I first started out with cleaning the playfield with a wood cleaner. To do this I removed all of the railroad gates first. The playfield was extremely dusty and had what I believe were mildew stains. I was surprised at how nice it looks underneath the years of dust and grime. I am eager to see it once all the pins and mental parts are cleaned and everything is back together.
 |
| Playfield before scrubbing |
 |
| Starting to see some of the original beauty beneath the grime |
Electrical switches under the shutter
Under the shutter is a board where the electrical switches and bell are. When the balls drop either through the Signal hole or when the shutter is pushed forward at the start of a new game, they roll down this board to the ball collection area. When the balls roll over the leaf switches, they close and touch the contact on the top half of the switch to the bottom half which lies under the table which close the electrical connection which activates the solenoid which pushes the armature inside the coil upwards which in turn opens the gates on the playing field. All of this is run by a 6 volt battery.
 |
| Top of the electrical switches |
 |
| Ball collection area leading to the ball lifter |
Initial Inspection and Breakdown
So the first thing I did was to start to take the machine apart to get the jammed balls out as well to clean and inspect the machine. The balls are in very bad shape. The yellow one is not an original and was used to replace either a badly damaged or missing ball. I am still in the process of cleaning the machine and removing some the rust. The playing field was held in by 4 screws. 3 of which were missing. I took them out a while ago when I was first looking to restore it and they disappeared. Luckily Ken from Prewar Pinball had some extras and sent them to me. Thanks Ken!
 |
| Playfield removed |
 |
| The shutter. You can see the dust from where holes in the playing field left it exposed |
 |
| The shutter from playing position |
 |
| Chipped glass balls |
Subscribe to:
Posts (Atom)